Looking to Install Solar?
5 Things to Know First
If you’re looking to install a solar energy system for your home, one can easily get a bit lost in all the numbers and factors involved in installing solar and transitioning your home to renewable, solar energy. A question you might have when considering going solar might be: What should I know before going solar? To make the transition simpler and more enjoyable – which it definitely can be – here are five factors to consider when installing solar panels and what to do before contacting your local solar installer.
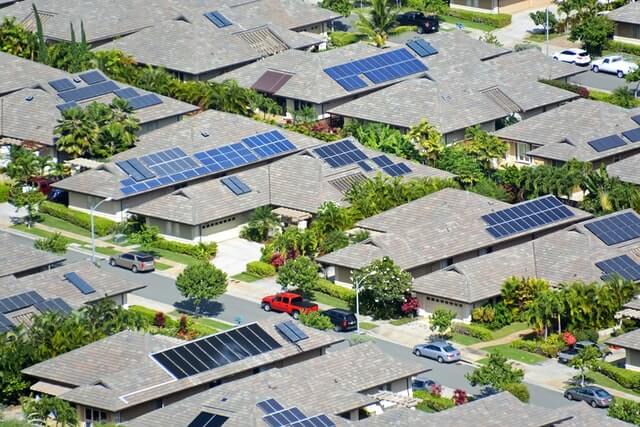
1. Is your home a good candidate for solar?
To start with, let’s take inventory of your home to see. For the sake of this article, we will focus on single family residences, where you own the home. You then can make all the decisions required to go solar. If you rent a house, you would need the owner to approve if not handle the transaction, and if you own but live in a multi-family building, you’d have to look at other avenues (e.g. community solar) to utilize solar power. If you own your home, let’s start here:
-
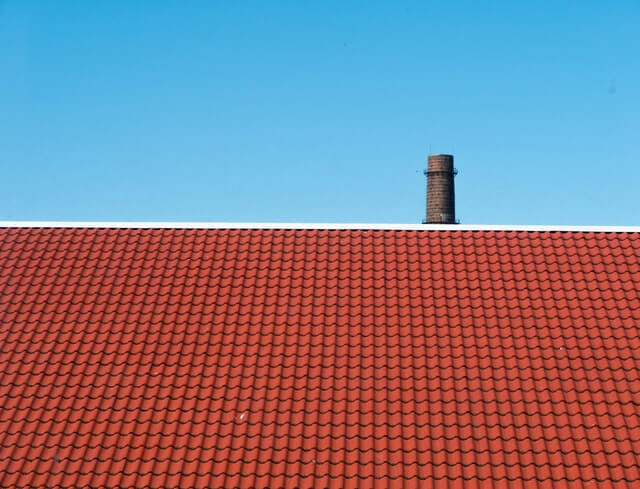
Roof Condition: Solar panels can be installed on virtually all roof types, but one should consider the age and condition of the roof first. If you are planning on getting a new roof in the near future, best to wait to install solar to avoid the cost of removing the panels later when the new roof gets installed. If you just can’t wait for that to start enjoying solar power, but as well can’t do the entire roof yet, you can possibly consider getting new roofing only on the specific roof facets that will host the panels, which brings up…
-
Roof Orientation: With solar panels becoming more powerful and more efficient, they will produce electricity no matter which direction they’re facing. However, to get the most annual production, the best direction for your panels to face is south, with the next best being west. So if you have roof facets facing these directions you’re in great shape, as long as you don’t have…
-
Shading: You’ll want your panels to harvest as much sun as possible, so it is best to have minimal, or better yet no shading on the panels. Consider potential shading on your roof from trees, or from a second story section onto a first story roof facet, or even your chimney or from a building next door. Shading will affect the production output of your system, so you’ll want to have your solar panel areas shade free, or best at least during the prime energy producing times of the day. As the solar sages say, “best if shade free from 9 to 3”.
2. Have an Idea of your Current and Future Electricity Usage
Solar (or “PV” for photovoltaic) systems will be sized according to how much daily electricity you use on average throughout the year. Sizing will also consider your future use and any expected changes, at least in the short term, so it’s good to have an idea on both so that you’ll know about how big of a system you would need.
-
Current Usage: This is easy, as you can normally track your daily usage via your billing statements or by generated reports available from your utility via your online account. Usage is based on kilowatt-hours (“kwh”), so you would divide the total kwh used during a billing period, by the days in that period, to find your average daily use. Do this for the entire year to take in account the seasonal differences, and you’ll have a good base number that your system would need to meet on a daily basis.
-
Future Usage: Your solar panels will last a good 30 years or so with high production, so you’d want to consider any big changes in your planned electrical usage, at least in the near term, so that your system will cover that as well. A new toaster won’t matter, but things that will cause a significant increase in your usage are an electric vehicle (or two); adding central air conditioning; adding a pool with traditional pool pumps, or any large loads that will be consistently used. Even if you’re not sure, it’s not a bad idea to oversize your system a bit vs. your current usage to cover normal increases – including those caused by being less conservative with your power since you have solar!
Helpful hint: Make your home as “energy efficient” as possible before adding solar so that you can decrease your daily usage and possibly reduce the solar system size you would need.
3. Do You Want Solar + Storage?
Energy storage, or battery backup power for the home, has been greatly gaining in popularity for homeowners to include in conjunction with a solar system. Simply put, having a battery backup system allows you to save your excess solar energy generated by your system to later use after the sun goes down vs. pulling power and charges from the utility grid. It also provides power to your home during a grid power outage. With storage, you are still connected to the grid, but less dependent on it. It addresses the “temporary” nature of solar power generation by saving it to lower your utility costs and keep the lights on at night if the grid goes down. Battery systems do add a decent cost increase to the system, which gets us to…

4. Costs and Financing of Going Solar
Costs of solar systems mainly depend on their size (number and power level of panels), and if you include a battery system. While some solar costs have definitely come down, other material costs in this equation, along with labor and other factors, have gone up. If you’re thinking you’ll wait for solar costs to come down more before purchasing, know that while technology will always improve, overall costs may not decrease, at least probably not near enough to offset getting your electric bill covered every month during the time you waited!
A cash purchase of the solar system will give you the best returns, but there are attractive solar financing plans available for $0 down and low interest rates. Either way you choose, you will be able to pay off your system by what you save by not having a large (or any) monthly electric bill. Further, when you do purchase – and therefore own – a system, you qualify for a federal tax credit which in 2022, gives you a credit equal to 26% of the total cost of the system. It is a significant credit and incentive, but note it goes down to 22% in 2023 and goes away all together in 2024.
Other options exist, for example the PACE loan program where one pays off a solar loan through their property taxes, or one can lease the system also with $0 down through certain companies. Note however if one leases the system, and therefore doesn’t own the system, one does not qualify to receive the federal tax credit.
Helpful hint: When looking at the cost of a solar system, look also at the favorable returns, such as return on investment, via your monthly/yearly savings against your current electric bill, both now and over the lifespan of the system (25 years +), which is equal to tax-free income.
5. Steps to Go Solar
There are a number of steps involved in getting your system up and running, both before the actual installation and after. It helps to know what these are if only to correlate it to any particular timeline you have to be running on solar energy. As well, if you’re keeping an eye on any rebate or tax credit deadlines, to go solar from start to finish you could be looking in the neighborhood of 2 - 3 months.

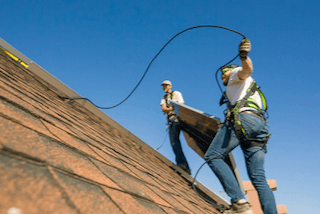
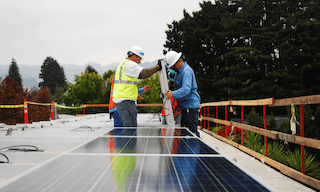
Step 1) Design and Cost Quote: select a local solar installer or two to do a design and cost quote. Do your due diligence and select a licensed installer with plenty of solar experience, selling high-quality components, with good online reviews and support services for any upgrades or issues down the line.
Step 2) Contracting: once you’ve decided on an installer and design, you will sign a contract covering all the terms of the installation. Usually a deposit is required at contract signing.
Step 3) Engineering Plans: your installer will formulate detailed engineering drawings and plans of the project to submit to the housing or building authority having jurisdiction for your town or neighborhood.
Step 4) Permits: your system plans are approved and permitted by the municipality.
Step 5) Installation: usually 1-2 days is about what it takes for the average solar system to be installed. If you’re adding a battery add a day or two more for everything to be tested and complete.
Step 6) Inspection: the installation will be inspected by the municipality, to verify the original plans were followed and the installation follows all rules and regulations.
Step 7) Permission to Operate: usually the last official step is where the local utility inspects, approves and authorizes the system. The system is then turned on and deemed operational. The moment the system is commissioned and turned on, it should be fully operational.
Step 8) Enjoy using clean, renewable energy, and saving costs the moment the system turns on!
Interested in solarizing a nonprofit?
Get a free quote or learn more
Related Content
Donate
About RE-volv
We believe that everyone should have the ability to support and spread clean energy. So we created a new way for people to take action. It's a pretty simple idea. Through an innovative solar financing model, these nonprofits immediately save on their electricity costs. As these organizations pay us back, we reinvest the money into more solar projects in communities across the country. This creates a revolving fund for solar energy that continually perpetuates itself building more and more solar. It's a pay-it-forward model for solar energy. We call it the Solar Seed Fund. Spread clean energy and make a tax-deductible donation to the Solar Seed Fund.
